Bind has no mid, which makes information king. These Recon Bolt and Shock Dart lineups clear A and B and punish the default plant spots.
By Mauk HK
Bind is the only map in the standard pool with no mid, just two teleporters connecting the two sites. That structure makes information the deciding resource: whoever knows where the rotations are, controls the round. Sova is the cleanest answer to that problem. A single Recon Bolt sweeps a site clear, and his Shock Darts are accurate enough to delete a defuser off a known plant spot from across the map.
Below are the Recon lineups for clearing A (Showers/Short, site, and the front angles) and B (Long, the full site, and Hookah), followed by Shock Dart damage lineups onto the default A and B plant spots. Every entry lists where to stand, what landmark to aim at, and the exact charge bars and bounce count, because with Sova those three numbers are the entire lineup.
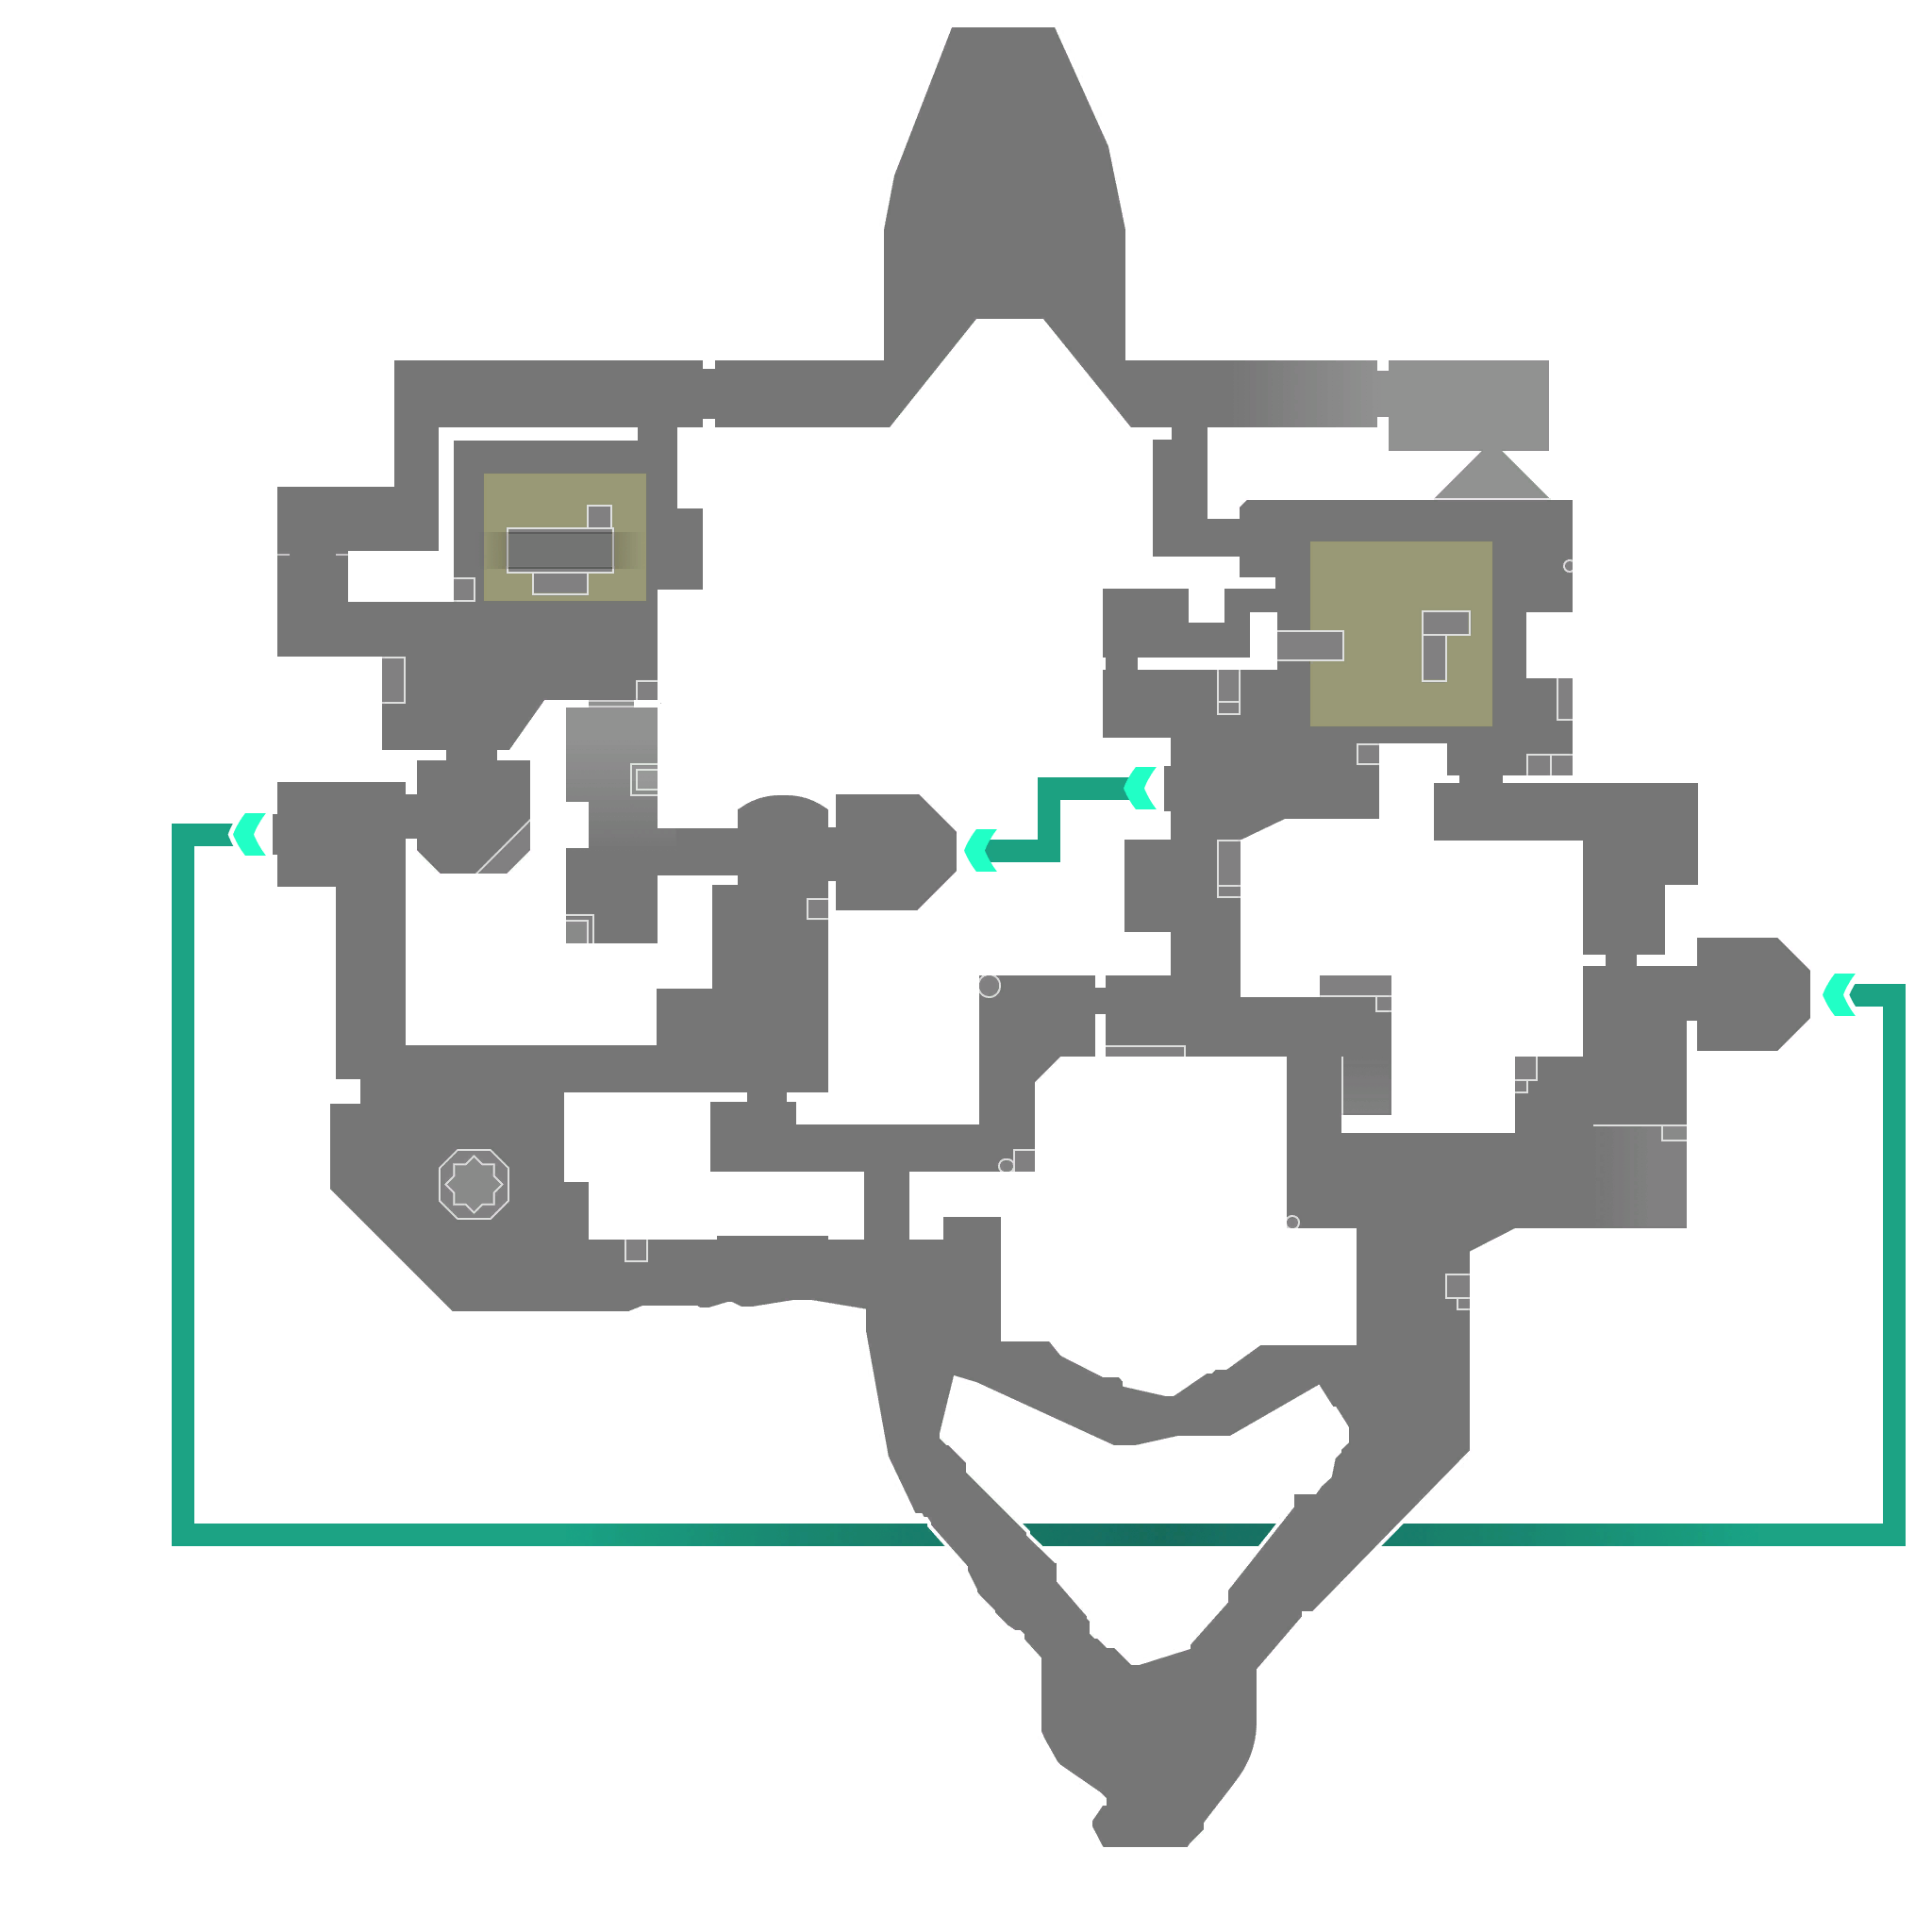
Bind minimap - A site (with A Short and A Showers/Bath) and B site (with B Long and Hookah), linked by the two teleporters instead of a traditional mid.
Sova's Kit in 60 Seconds
Recon Bolt (E): an arrow that sticks and pulses, tagging every enemy in line of sight. Charge bars control distance/flight; bounces (0, 1, or 2) let it ricochet off walls into a site. Shoot it down to stop the reveal, so favour spots that are awkward to clear.
Shock Bolt (C): a damage arrow that detonates on impact for a burst of damage. Two charges. Used as a clearing tool early and, more famously, as a post-plant kill lineup onto a known plant location.
Owl Drone (Q): a pilotable recon drone that can fire a tagging dart. Slower but precise, and the drone UI doubles as the alignment reference for many of his arrow lineups.
Hunter's Fury (X): his ultimate. Three long-range energy blasts that pierce walls across the whole map, dealing heavy damage and revealing anyone hit. A retake and post-plant monster.
Set up a Custom Game, turn on infinite ability charges and the arrow trajectory line, and place a bot bomb on the default spot. Throw, check the landing, adjust the charge by a sliver, repeat. Sova lineups live and die on a quarter-bar of charge. Practise until the bar position is automatic.
A-Site Recon Bolt Lineups
Sova's Recon Bolt (E): the reveal arrow used for the A Showers lineup below. From A Lobby, stand in the corner next to the box, aim at the corner of the solar panel, one bounce, charge barely more than one bar.
A Showers Recon
Stand: in the corner next to the box in A Lobby.
Aim: at the corner of the solar panel above.
Technique: one bounce, charge just barely more than one bar.
Result: the bolt ricochets into Showers and tags anyone holding that flank before you commit to A.
Frontside A Recon
Stand: on the wooden-box corner in the A Lobby area.
Aim: at the tip of the leaf above you.
Technique: one-bar charge, no bounces.
Result: a flat, fast reveal of the front of A Site / the near angles as you swing out of Lobby.
Backside A Recon
Stand: in the corner just outside A Short.
Aim: at the palm tree, aligning it with the left diamond of your drone UI.
Technique: more than one bar but less than two bars of charge.
Result: the dart reaches the back of A Site, catching defenders tucked deep where a frontside bolt would miss.
B-Site Recon Bolt Lineups
Sova's Recon Bolt (E): also runs the B Hookah reveal below. From spawn, stand next to the wooden door frame, align the left circle of the drone UI with the corner of the window, charge less than one bar.
B Hookah Recon
Stand: next to the wooden door frame at spawn, where the barriers drop.
Aim: at the corner of the window, aligning the left circle of your Owl Drone UI with that corner.
Technique: less than one bar of charge, no bounce.
Result: the bolt drops onto the Hookah wall and reveals anyone playing that room before you push B Long or A Short.
Entire B Site Recon
Stand: in the corner in B Short.
Aim: at the top of the building corner.
Technique: two-bar charge.
Result: the dart sticks high over B Site and sweeps the whole site at once, the highest-value B reveal in the kit.
B Long Recon
Stand: in the fountain corner.
Aim: just to the left of the wall sign.
Technique: maximum charge with one bounce.
Result: the bolt travels the length of B Long and bounces in deep, tagging defenders holding the far end of the lane.
Shock Dart Post-Plant Lineups
Sova's Shock Darts shine after the plant. Because Bind's default plant spots are so consistent, you can stand on a flank, fire two darts in sequence, and land both directly on the spike. A double Shock Dart does enough damage to kill a half-health defuser outright and chunk a full-health one badly, and it costs you nothing positionally. You stay safe watching flank the whole time.
Sova's Shock Bolt (C): the damage dart used for the A default double-Shock post-plant below. Hold flank from A Short / Teleport; first dart at the corner where the wires meet with one bounce and a three-bar charge (not full).
A Default - Double Shock Dart
Stand: in the corner holding flank from A Short / the A Teleport side after the plant.
First dart: aim at the corner where the wires meet, one bounce, three-bar charge (not fully maxed).
Second dart: turn and aim just below the middle of the structure with the adjusted alignment.
Technique: fire both in sequence; both detonate on the A default plant spot.
Result: a defuser on the default plant eats two darts back-to-back, a near-guaranteed kill on anyone already chipped.
B Default - Double Shock Dart
Stand: in the corner near the Teleport in B Long after the plant.
First dart: align with the leaf on the wall, two-bar charge.
Second dart: same position, one-bar charge.
Technique: fire the two-bar first then the one-bar; both land on the B default plant.
Result: heavy damage onto the spike from total safety. Pair it with a Recon refresh to confirm the defuser is sitting there before you fire.
Defensive Bolts (Bonus)
When you are defending, the LAB corner near A is a goldmine of reusable Recon angles. From that one spot you can reveal A Showers (aim the right circle of your drone UI at the third steel bar, three-bar charge but not full), A Short (right circle on the window corner, same three-bar charge), and B Short / Hookah (aim at the crossing-steel-bars corner, two-bar charge). For B Long on defense, set up to view the lane, aim at the top of the leaf, and throw at maximum charge with two bounces to flood the whole lane with a reveal.
Quick Reference
Lineup
Stand
Aim
Charge / Bounce
A Showers Recon
A Lobby box corner
Solar panel corner
~1 bar, 1 bounce
Frontside A Recon
A Lobby wooden box
Tip of leaf
1 bar, 0 bounce
B Hookah Recon
Spawn door frame
Window corner (left circle)
<1 bar, 0 bounce
Entire B Recon
B Short corner
Top of building corner
2 bars
B Long Recon
Fountain corner
Left of wall sign
Max, 1 bounce
A Default Shock
A Short / TP flank
Wires corner
3 bars, 1 bounce (x2)
B Default Shock
B Long near TP
Leaf on wall
2 bars + 1 bar
Bind rewards the team that always knows where the enemy is. Lock in the A Showers and B-site Recon clears plus the two double Shock Dart post-plants first. That handful covers most of your rounds on both attack and defense. Then add the LAB-corner defensive set so you can recon a whole side without ever leaving cover.
"
On Bind, information wins the round before the gunfight starts. Recon the angle, then take it on your terms.